
If you’re a business owner looking to streamline your accounting processes, Xero is a powerful and user-friendly option. In this guide, we'll walk you through the steps to set up your Xero account and get started with this cloud-based accounting software. I’ll even highlight some of my favourite points in red.
Why Choose Xero?
Xero is popular among small to medium-sized businesses due to its ease of use, accessibility, and integration capabilities. Whether you need to manage invoices, track expenses, or reconcile bank transactions, Xero offers comprehensive tools to keep your finances in check.
Step 1: Sign Up for Xero
Visit the Xero Pricing Plans to choose a plan: Xero offers several pricing plans based on your business size and needs, or start with a free trial to explore its features. Xero has month by month plans with no lock in contracts.
Discounts: Xero often offers discounts when you first sign up. From my experience the best deals often occur around financial and calendar year end. While I wouldn’t wait months to save a few dollars, if you are on the fence about signing up that can be a great time to start.
Note that some features like lodging your BAS from Xero is not available on the free version.
Step 2: Set Up Your Organization
Enter Organisation (Business) Details: Fill in your business name, industry and contact details.
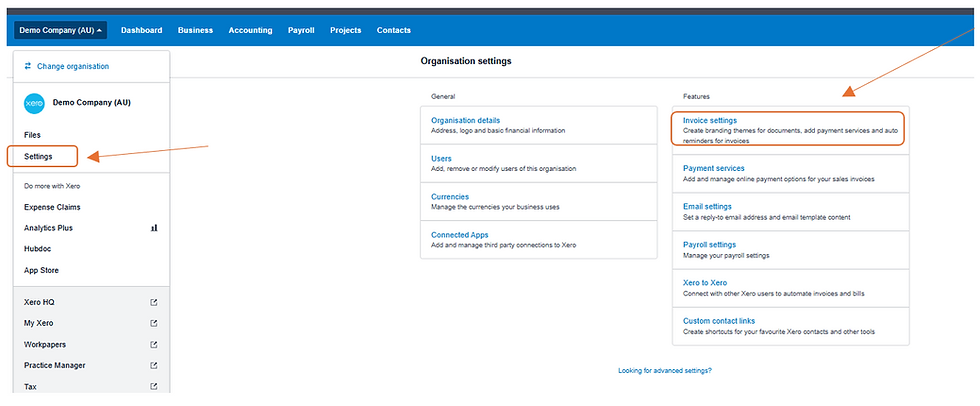
Navigation: Click your business name and settings to access your organisation settings.

Invite Users: If you have an accountant or team members who need access, invite them now. If you have people who only need access to some areas of your Xero file permissions can be adjusted accordingly. As an accountant I prefer to be to be setup as an Advisor, with Payroll admin and the ability to manage users, that way I don’t need to go back to you for update permissions.
Navigation: Click your business name and settings to access your Users settings.

Financial Settings: Set up your financial year-end, GST settings, and default tax rates. If you are unsure about how to record these sections I would suggest contacting your accountant for assistance.
Navigation: Click Accounting and Advanced to access your Financial settings.

Step 3: Connect Your Bank Accounts
Go to Banking: From the dashboard, click on the ‘Bank Accounts’ tab or if you already have a bank account setup it can be accessed through the accounting menu.
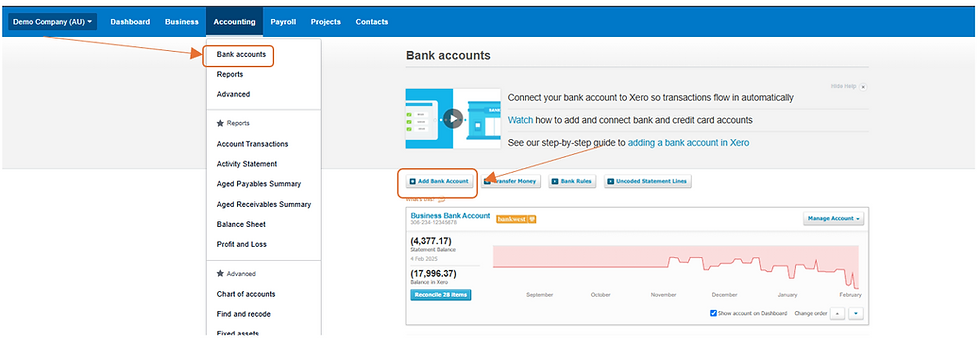
Add Bank Account: Select your bank from the list or enter your bank details manually.
Set Up Bank Feeds: Enable automatic bank feeds to import transactions directly into Xero. Depending on the bank, this may allow for online setup using your bank login, or it may require signing and submitting a form to the bank.
While bank accounts can be imported manually it is tedious and not the best use of the software.
Depending on where you hold your credit cards and loans they can also potentially have Xero data feeds.
My Advice – To best manage your business finances make sure you have dedicated business bank accounts. If you use a personal bank account or credit card for your business transactions it will make tracking your business performance significantly harder and more confusing.
Step 4: Customise Your Invoices
Invoice Settings: Navigate to ‘Settings’ > ‘Invoice Settings’ and customize your invoice template with your logo and payment terms.
Payment Services: Link payment services like Stripe or PayPal to allow customers to pay invoices online.
My Advice – I personally linked Stripe to my Xero account to allow for card payments on my invoices. I started receiving payments in hours instead of weeks and it made reconciling my accounts significantly easier.
While Stripe does incur a fee you can opt to cover this charge yourself or pass the cost onto the client. Personally, my invoices include bank transfer options and the option to pay by card. As the client can bank transfer for no cost, I see no issue having the additional credit card processing charge being paid by them for the convenience.
Step 5: Explore Features
Dashboard Overview: Familiarise yourself with the dashboard, where you can track key financial metrics.
Update Chart of Accounts: Set up expense categories and start recording business expenses. Xero will come with a default set of accounts, but this often doesn’t have everything needed to suit your business operation. You can add new accounts to suit your specific categories of income, expenses, assets, liabilities and equity. In many cases accountants can import their own chart of accounts which may suit your business better.

Payroll: Your payroll can also be recorded in Xero, but the explanation is too lengthy for me to advise in this guide. With comprehensive and above Xero subscriptions you can also automate superannuation payments in Xero.
Profit & Loss, Balance Sheet and Cash Flow Reports: These are all accessed through Accounting -> Reports and are how you can interpret the information you have recorded. Without knowledge of the subject it may not mean a lot to you, but a good accountant can help you understand these reports and what they say about your business performance.
Tips for Getting the Most Out of Xero
Integrate Apps: Enhance Xero’s functionality by integrating with other business tools, like payroll or inventory management systems.
Hubdoc: My favourite integrated app is Hubdoc. This app allows you to store and record all your expenses. I use this to take photos of my receipts and I can email a copy of any invoices I have paid online. This integration is free and can be accessed here:

Regular Updates: Keep your data up-to-date by reconciling weekly. Going back and reconciling months at a time can be daunting and I don’t know about you, but I hardly remember dinner last night, let alone a $12 expense from 4 months ago.
Bank Account Rules: Xero's bank account rules allow you to automate transaction coding by setting conditions for incoming bank feeds. When transactions match the predefined criteria, Xero automatically categorises them, saving time on manual reconciliation. For example, you can tell Xero that any bank account transaction that says “Telstra” we will know is always a telephone expense. This will also work with income or when transferring between bank accounts. Just make sure you don’t use rules that are too generic like finding everything that says “BPAY” or you may incorrectly allocate transactions.

Conclusion
Setting up Xero is straightforward and can significantly improve your business’s financial management. Follow these steps to get started, and explore all the features Xero has to offer. If managing your accounts is too much work, or just not something you want to do, please reach out and we would be happy to assist.
コメント